|
<< Click to Display Table of Contents >> Clarion + JavaScript: is very easy |
  
|
|
<< Click to Display Table of Contents >> Clarion + JavaScript: is very easy |
  
|
How often while surfing the Internet you met something unusual and said to yourself: if I could add it into my application! Unfortunately, Clarion in terms of user interface can not yet compete with the web sites.
In fact, not everything is so bad. Let's try combining Clarion and JavaScript. For example, take a simple script that implements an animated circle menu: Animated Circle Menu with jQuery and CSS3.
Let's create new Clarion application with AnimatedCircleMenu name. I'll use C8, however, the following technique is true for Clarion version 6.3 and higher.
Download index.html and put it into html subfolder. To view the script in action, double-click on it to open in web browser.
Add EasyHtml global extension to enable JavaScript.
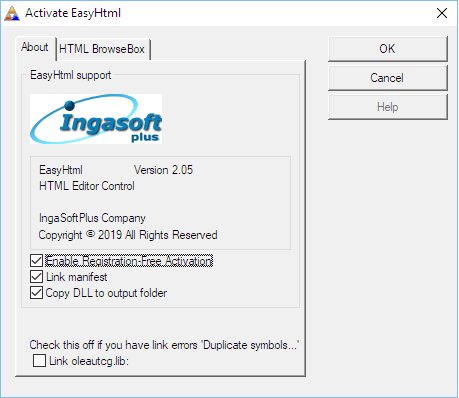
Our Main procedure should be a WINDOW template. Drop the EasyHtmlCtrl control onto the window. Leave all control settings by default.
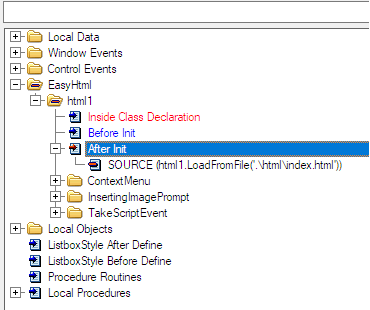
In embed tree jump to “EasyHtml->html1->After Init” and write the code to load index.html:
html1.LoadFromFile('.\html\index.html')
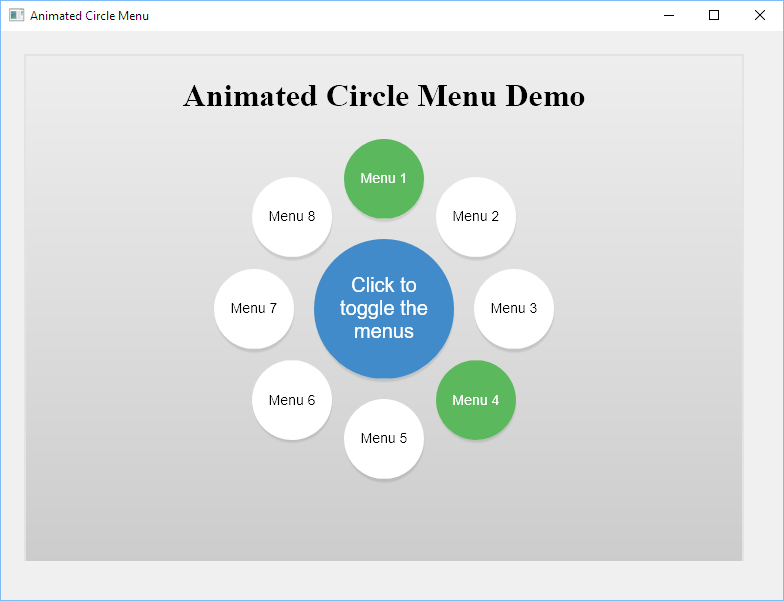
Save, compile and run your application:
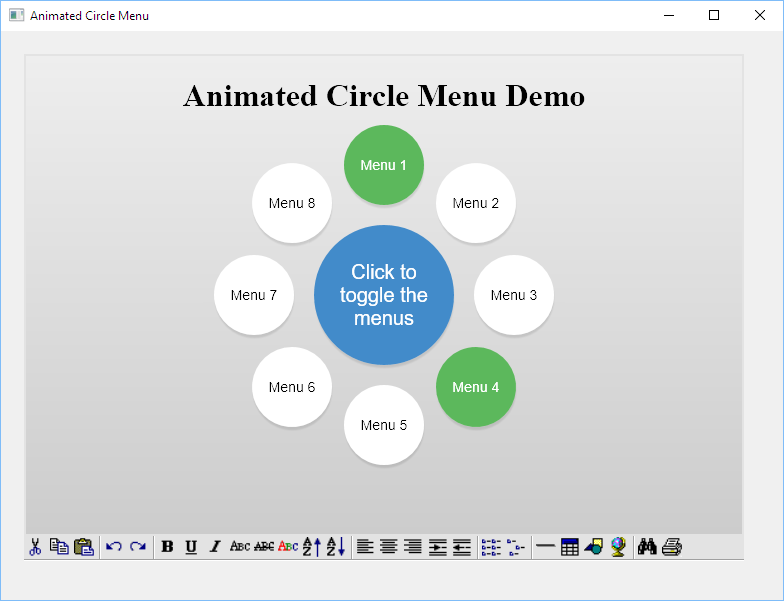
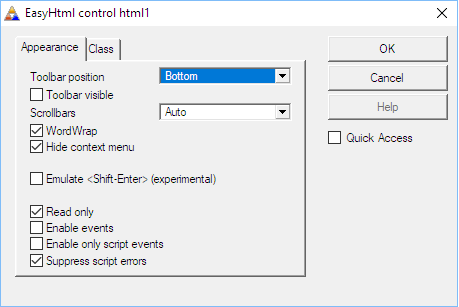
As we can see the script works but the window contains an unnecessary toolbar and context menu pops up on right-mouse click. So to fix this go to Extensions->EasyHtml and change some settings – hide toolbar and context menu, also turn Read only on:
Save, compile and run it again, now the window contains just what we need!
It's logical to assume that somehow we need to handle the user's choice. That is, the JavaScript code should tell Clarion program which menu item was checked on or off.
Open index.html in any text editor (you can do it right in Clarion IDE) and write a few lines at the end of the <body> block.
Surely you have already noticed that the circle menu items are actually check boxes, so it’s rather a selector, but we will continue to call this control “menu” so not to get confused in the terminology.
Let's create new script block for our code which will be responsible for interacting with Clarion.
First function is event handler change for any element of type input (which is actually checkbox), and is called when a checkbox's state was changed:
$('.selector li input').change(function(e) {
onToggle($(this));
});
Second function onToggle sends to Clarion an information of changed item:
function onToggle(cb) {
var label = cb.parent().find('label');
var item = {
"id": cb.attr('id'),
"text": label.text(),
"checked": cb.is(":checked")
};
window.external.SendEvent("onToggle", JSON.stringify(item));
};
If it is not clear what the code above does just look at the html structure that describes an item:
<li>
<input id='c1' type='checkbox'>
<label for='c1'>Menu 1</label>
</li>
item is an object with 3 properties: id, text and state (checked or not). We send it as json string via window.external.SendEvent().
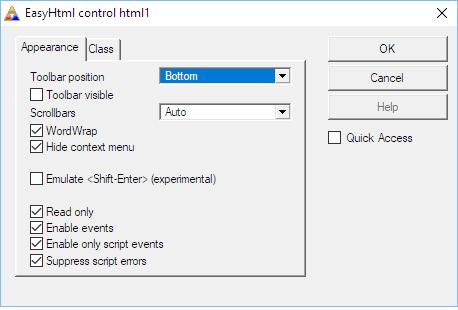
By default EasyHtml will ignore all events. To enable them, go to EasyHtml procedure extension and turn on 2 options: “Enable events” and “Enable only script events”:
Further, jump to embed point TakeScriptEvent and write onToggle handler:
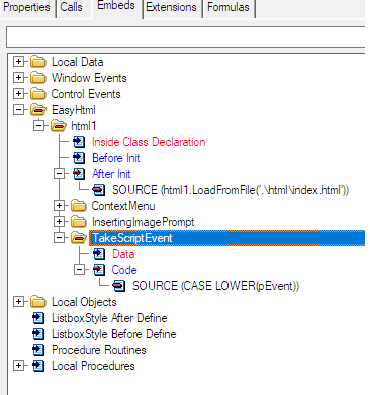
TakeScriptEvent method receives 2 string parameters: pEvent and pData, so the code will look like this:
CASE LOWER(pEvent)
OF 'ontoggle'
MESSAGE(pData)
END
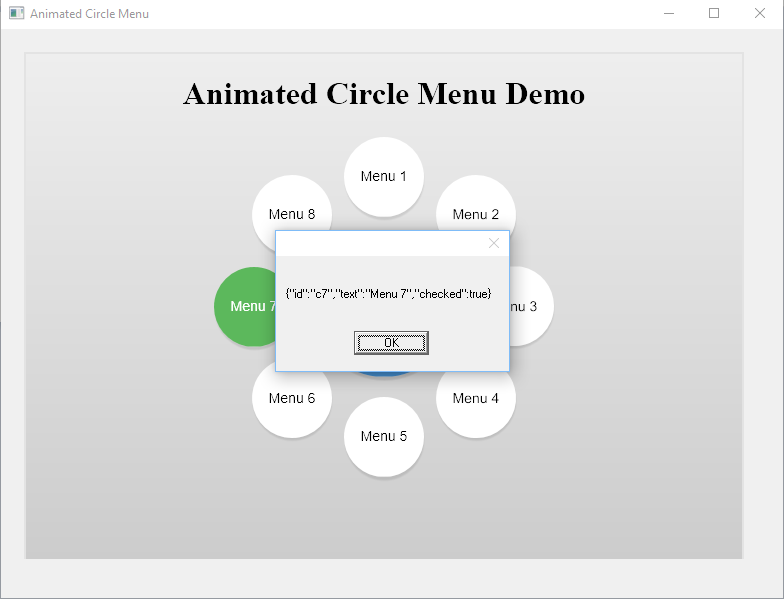
Save, run and see which message we get:
Let's do a more meaningful handling of the onToggle event than just show a MESSAGE. To do this, add the TEXT control to the window:
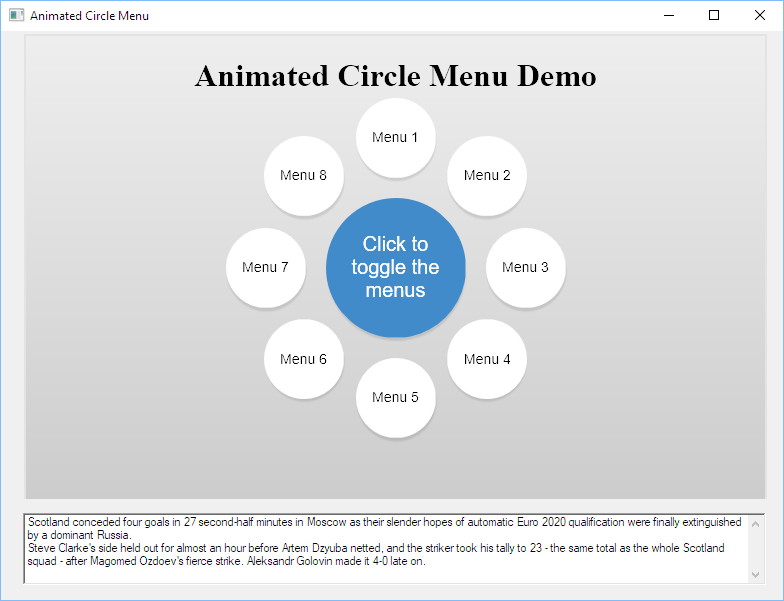
Make our menu items be responsible for the TEXT properties: bold, disabled, etc. For example, like this:
CASE item.id
OF 'c1'
IF item.checked
?TEXT1{Prop:FontStyle} = FONT:bold
ELSE
?TEXT1{Prop:FontStyle} = FONT:regular
END
OF 'c2'
IF item.checked
?TEXT1{Prop:Disable} = TRUE
ELSE
?TEXT1{Prop:Disable} = FALSE
END
END
But we do not have an item object, there is only a string parameter pData containing the json representation of the item object. How to access these properties? For example, we can use cJSON.
Go to Global embeds, After Global INCLUDEs, and write
INCLUDE('cjson.inc'), ONCE
Now back to TakeScriptEvent. Declare local variables:
cf |
cJSONFactory |
item |
&cJSON !- item object |
id |
&cJSON !- id property, string |
checked |
&cJSON !- checked property, boolean |
To get item object, call Parse method of cJSONFactory:
item &= cf.Parse(pData)
The properties can be obtain this way:
id |
&= item.GetObjectItem('id') |
checked |
&= item.GetObjectItem('checked') |
The value of string property is returned by GetStringValue() method, the value of Boolean property is returned by IsTrue()or IsFalse().
Now we able to write the code to change TEXT properties (only first 2 options are shown):
CASE LOWER(pEvent)
OF 'ontoggle'
!- pData is json representation of clicked item:
!- {"id":"c7","text":"Menu 7","checked":true}
item &= cf.Parse(pData)
IF NOT item &= NULL
id &= item.GetObjectItem('id')
checked &= item.GetObjectItem('checked')
CASE id.GetStringValue()
OF 'c1' !- bold
IF checked.IsTrue()
?TEXT1{PROP:FontStyle} = FONT:bold
ELSE
?TEXT1{PROP:FontStyle} = FONT:regular
END
OF 'c2' !- disable
IF checked.IsTrue()
?TEXT1{PROP:Disable} = TRUE
ELSE
?TEXT1{PROP:Disable} = FALSE
END
….............
END
!- dispose dynamic memory
item.Delete()
END
END
Save, run and test:
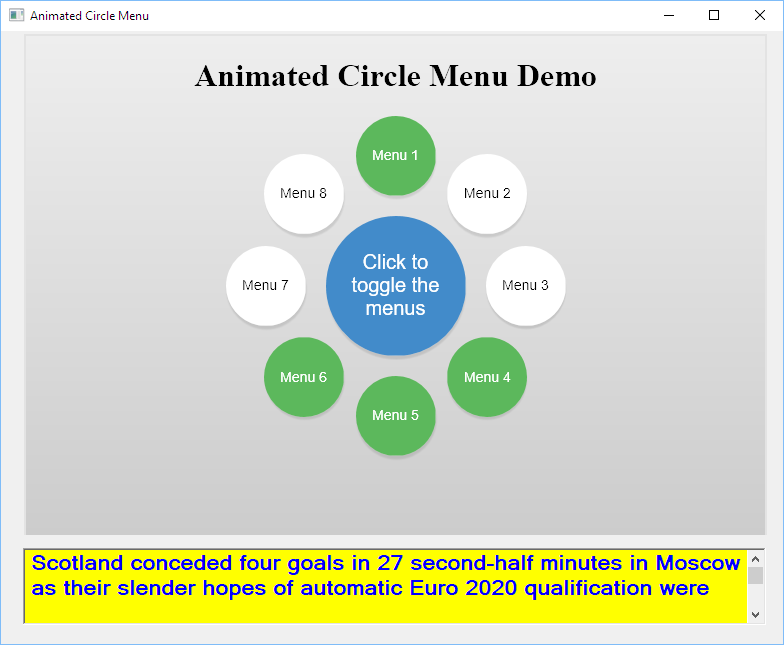
Now a question arises: how to rename these weird labels “Menu 1”, “Menu 2” and so on?
Of course you can rename the items directly in the html document, and this is the correct solution. But for training purposes, we'll do it directly from the Clarion code. We'll add one more function changeItemText:
function changeItemText(id, newText) {
var cb = $("#" + id);
var label = cb.parent().find('label');
label.text(newText);
};
It takes id of the element and new text. To invoke the JavaScript function from Clarion, use the InvokeScript method. Its first parameter is the name of the function being called, the remaining arguments corresponds to the arguments to the JavaScript function.
Let's rename all items immediately after loading the document:
!- load html
html1.LoadFromFile('.\html\index.html')
!- rename items
html1.InvokeScript('changeItemText', 'c1', 'Bold')
html1.InvokeScript('changeItemText', 'c2', 'Disable')
html1.InvokeScript('changeItemText', 'c3', 'Read only')
html1.InvokeScript('changeItemText', 'c4', 'Enlarge')
html1.InvokeScript('changeItemText', 'c5', 'Color')
html1.InvokeScript('changeItemText', 'c6', 'Background')
html1.InvokeScript('changeItemText', 'c7', 'Flat')
html1.InvokeScript('changeItemText', 'c8', 'Hide')
Make sure that all the labels has been changed:
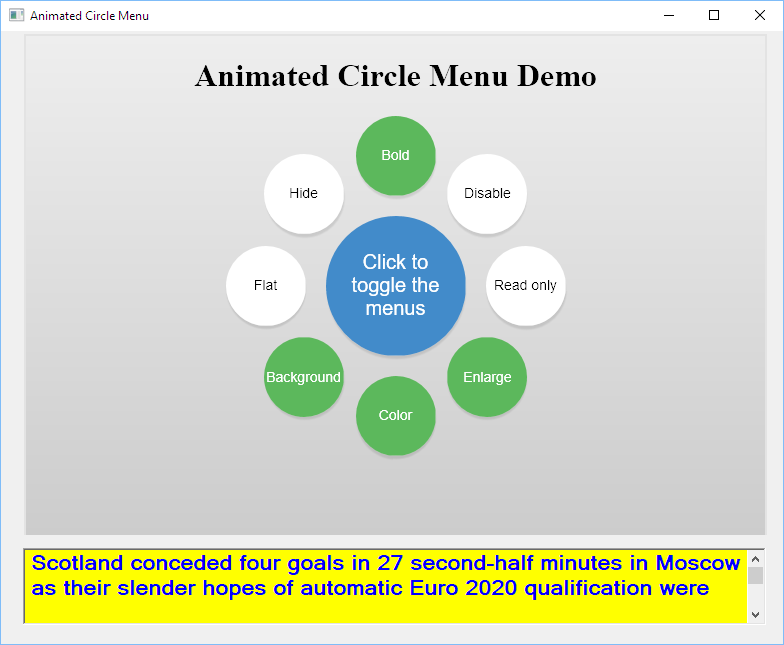
That's all! I hope this article was easy to understand and helpful for you.
Do not hesitate to ask any questions to the author mikeduglas
You can download a source code of related materials (like example app, html etc.) from here.